[카테고리:] UI COMPONENTS

  • Navigation Bars – Types

    Navigation Bars – Types

    Detailed Guide to Key Types of Navigation Bars

    Navigation bars are an essential UI component, acting as the central hub for users to interact with and explore digital platforms. Depending on the platform, user needs, and design goals, navigation bars take on different forms and styles. In this article, we will explore the major types of navigation bars, their features, use cases, and best practices to help you design effective navigation systems that cater to diverse users.


    1. Top Navigation Bars

    Definition

    Top navigation bars are horizontal menus located at the top of a webpage or application. They are the most traditional form of navigation and are widely used across desktop platforms.

    Key Features

    • Visibility: Always prominent, making it easy for users to locate and access options.
    • Space Allocation: Ideal for platforms with sufficient horizontal space, such as desktops.
    • Dropdown Menus: Often include dropdowns to organize secondary and tertiary options.

    Best Use Cases

    • Corporate websites: For primary pages like “About,” “Services,” “Contact.”
    • E-commerce: Categories such as “Home,” “Shop,” “Deals.”
    • Blogs: Sections like “Home,” “Articles,” “Resources,” “Contact.”

    Design Tips

    • Ensure that dropdowns are easy to interact with.
    • Use fixed positioning to keep the nav bar visible while scrolling.
    • Highlight the current page or section for better orientation.

    2. Side Navigation Bars (Drawer Navigation)

    Definition

    Side navigation bars, also called “drawer navigation,” are vertical menus located on the left or right side of a screen. They are often hidden behind a toggle (hamburger menu) and slide into view when needed.

    Key Features

    • Space Efficiency: Maximizes screen space by remaining hidden until activated.
    • Scalability: Suitable for systems with multiple menu items or nested categories.
    • Customizable: Can include collapsible submenus for better organization.

    Best Use Cases

    • Mobile applications: Where screen space is limited.
    • Enterprise tools: For complex systems requiring deep hierarchies.
    • Dashboards: Where functionality and content are segmented into modules.

    Design Tips

    • Ensure the toggle button is easily discoverable.
    • Provide visual feedback (e.g., animation) when the menu opens or closes.
    • Maintain consistency in placement across screens or pages.

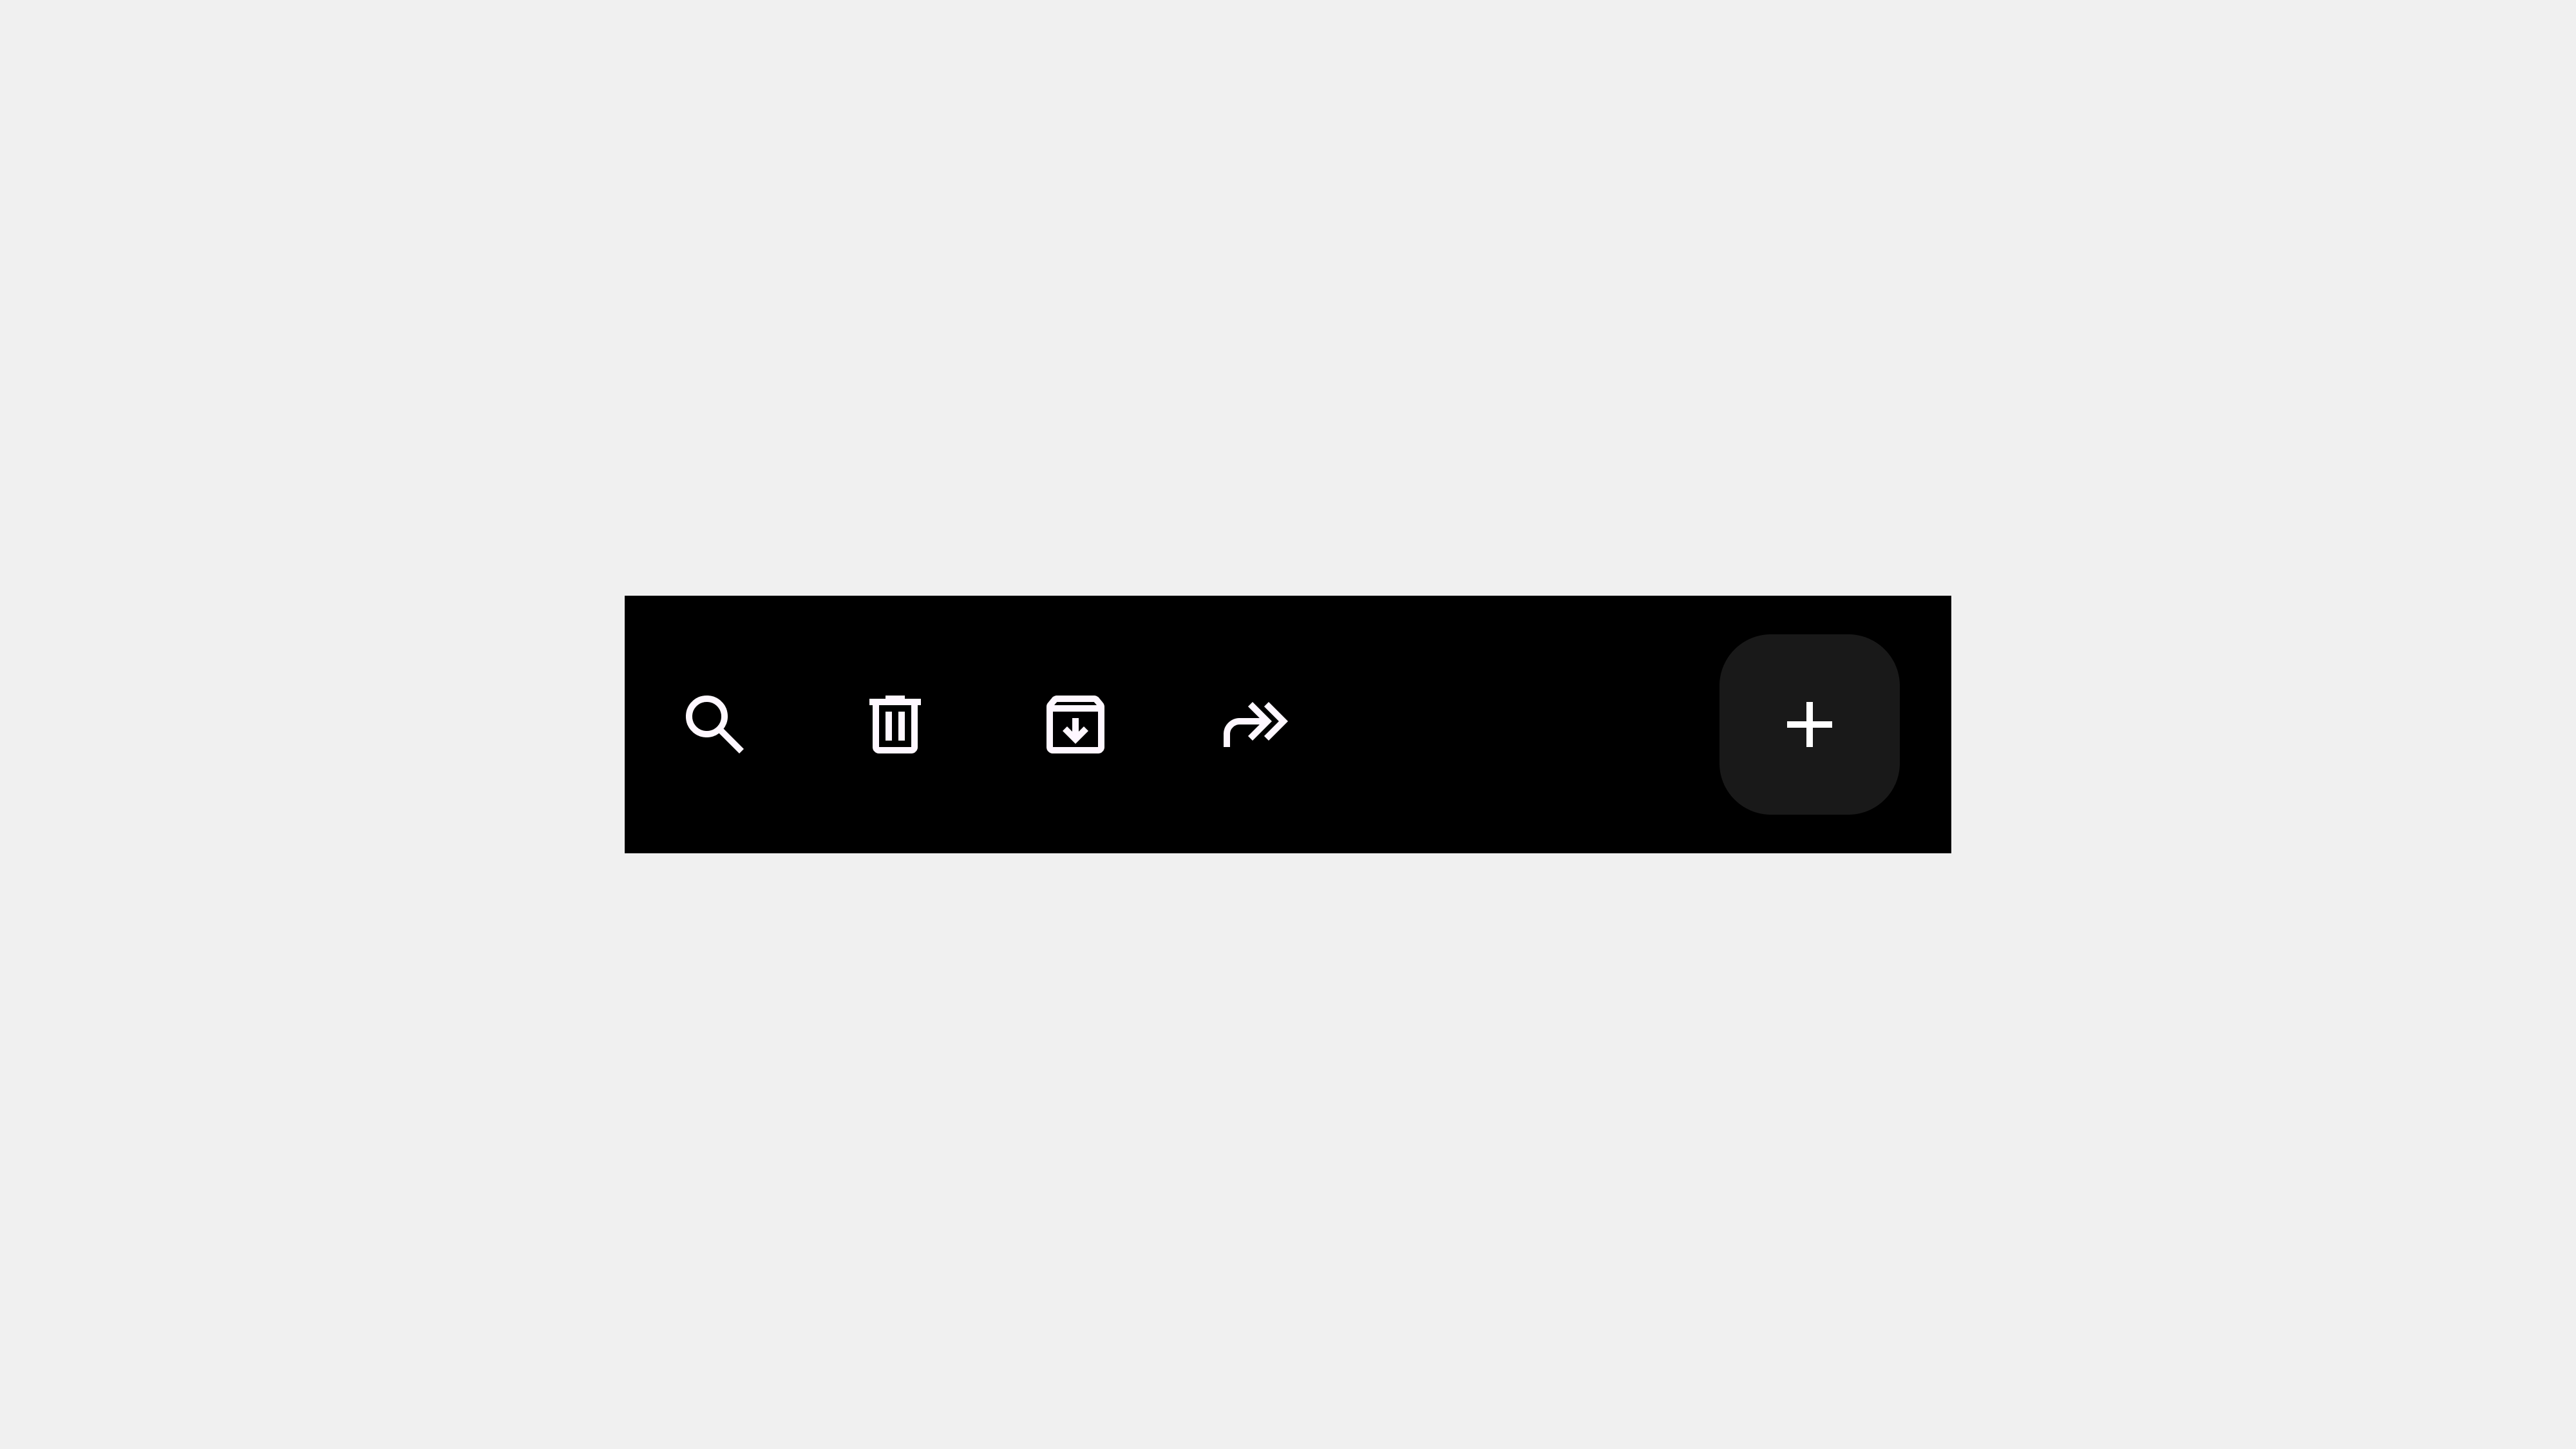
    3. Bottom Navigation Bars

    Definition

    Bottom navigation bars are horizontal menus positioned at the bottom of the screen. They are widely used in mobile apps to provide easy access to core actions.

    Key Features

    • Thumb Reach: Optimized for one-handed use on mobile devices.
    • Icon-Based: Often uses icons with labels for clarity.
    • Limited Options: Best for up to 5 primary destinations.

    Best Use Cases

    • Social media apps: Sections like “Home,” “Search,” “Post,” “Profile.”
    • Music apps: Options like “Home,” “Search,” “Library,” “Settings.”
    • Finance apps: Tabs for “Dashboard,” “Transactions,” “Accounts.”

    Design Tips

    • Prioritize clarity in icon design and labeling.
    • Avoid overcrowding; limit the number of menu items.
    • Use feedback like highlighting the active tab.

    4. Tab Navigation

    Definition

    Tab navigation divides content into discrete sections, with tabs often displayed horizontally or vertically. It is best suited for categorizing related information.

    Key Features

    • Ease of Use: Tabs are intuitive and easy to navigate.
    • Space Efficiency: Group multiple sections in a compact layout.
    • Immediate Access: Switches content without reloading the page.

    Best Use Cases

    • Product pages: Showing “Description,” “Reviews,” “Specifications.”
    • Settings pages: Tabs for “General,” “Security,” “Notifications.”
    • Content-heavy platforms: Grouping categories like “Trending,” “Popular,” “New.”

    Design Tips

    • Use consistent styling across tabs.
    • Indicate the active tab with a clear visual cue.
    • Avoid deep hierarchies; tabs should remain simple and straightforward.

    5. Fixed Navigation Bars (Sticky Navigation)

    Definition

    Fixed navigation bars, also called “sticky navigation,” remain visible as users scroll through a webpage or application.

    Key Features

    • Persistent Accessibility: Ensures key actions are always available.
    • Streamlined Experience: Reduces the need to scroll back to the top.
    • Enhanced Usability: Keeps users oriented, especially on long pages.

    Best Use Cases

    • Content-heavy websites: News portals or blogs with lengthy articles.
    • E-commerce: Providing quick access to the cart or categories.
    • SaaS tools: For actions like “Save,” “Edit,” “Dashboard.”

    Design Tips

    • Avoid taking up too much vertical space.
    • Test the bar’s visibility and interactions across devices.
    • Use smooth transitions to minimize distraction.

    6. Dynamic and Contextual Navigation Bars

    Definition

    Dynamic navigation bars adapt to the user’s current context or behavior, displaying options relevant to their actions.

    Key Features

    • Personalization: Offers tailored options based on user activity.
    • Dynamic Content: Adjusts menu items depending on the page or task.
    • Reduced Clutter: Simplifies the interface by hiding irrelevant options.

    Best Use Cases

    • E-learning platforms: Showing “Next Lesson” or “Quiz” based on progress.
    • Design tools: Displaying tools specific to the selected object (e.g., text, image).
    • Productivity apps: Adapting menus for “Editing” vs. “Viewing” modes.

    Design Tips

    • Provide clear cues when the navigation changes.
    • Ensure users can still access less-frequent options easily.
    • Avoid over-customization that might confuse users.

    7. Mega Menus

    Definition

    Mega menus are expansive dropdown menus that display multiple levels of navigation at once.

    Key Features

    • Content-Rich: Showcases a wide range of options in a single view.
    • Categorical Clarity: Groups related items for better discoverability.
    • Visual Enhancements: Often includes icons, images, or descriptions.

    Best Use Cases

    • E-commerce platforms: For categories like “Electronics,” “Clothing,” “Home & Kitchen.”
    • Educational sites: Offering sections like “Courses,” “Resources,” “Community.”
    • Travel websites: Featuring “Flights,” “Hotels,” “Car Rentals.”

    Design Tips

    • Use logical grouping for categories.
    • Optimize for responsiveness; mega menus must work on mobile devices.
    • Avoid overwhelming users with excessive information.

    8. Hidden or Collapsible Navigation

    Definition

    Hidden or collapsible navigation bars remain concealed until activated by a user action, such as clicking a button or hovering over an area.

    Key Features

    • Minimalist Design: Keeps the interface clean and distraction-free.
    • Action-Based Access: Requires explicit user interaction to reveal.
    • Flexibility: Works well for secondary or less-critical options.

    Best Use Cases

    • Creative portfolios: Allowing users to focus on visual content.
    • Landing pages: For a focused call-to-action without distractions.
    • Apps with limited screen real estate.

    Design Tips

    • Clearly indicate how to open the navigation.
    • Ensure accessibility for users with disabilities.
    • Test interactions to avoid usability issues.

    Conclusion

    Understanding the types of navigation bars and their unique roles helps UX/UI designers create systems that cater to specific user needs and platform constraints. From traditional top navigation to dynamic and contextual bars, each type has its advantages and challenges. By tailoring navigation design to the intended audience and use case, you can create intuitive, accessible, and engaging digital experiences.


    Summary:

    Tags:

  • 내비게이션 바 – 주요 유형

    내비게이션 바 – 주요 유형

    내비게이션 바의 주요 유형: 설계와 적용의 모든 것

    내비게이션 바는 사용자가 웹사이트나 애플리케이션을 탐색하는 데 있어 가장 기본적이면서도 중요한 UI 요소다. 다양한 사용자 환경과 디바이스 특성에 따라 내비게이션 바는 여러 유형으로 나뉜다. 각 유형은 그 특성과 목적에 맞게 설계되어야 하며, 사용자 경험을 극대화하기 위해 최적의 방식으로 구현되어야 한다. 이번 글에서는 내비게이션 바의 주요 유형을 정의하고, 각각의 장단점, 사용 사례, 설계 팁을 상세히 설명한다.


    내비게이션 바의 주요 유형

    1. 탑 내비게이션 바 (Top Navigation Bar)

    정의

    탑 내비게이션 바는 화면 상단에 위치하며, 가장 널리 사용되는 내비게이션 유형이다. 사용자에게 서비스를 대표하는 메뉴 항목을 명확히 제공하며, 직관적으로 접근할 수 있다.

    특징

    • 메뉴가 가로 방향으로 나열되어 있어 심플하고 직관적이다.
    • 로고, 주요 링크, 검색 창 등 핵심 요소가 포함된다.
    • 주로 데스크탑 환경에 적합하지만, 반응형 디자인을 통해 모바일에서도 활용 가능하다.

    장점

    • 직관적이고 사용자가 즉시 인식 가능.
    • 모든 주요 메뉴를 한눈에 볼 수 있어 탐색이 간편.
    • 브랜드 로고와 결합하여 아이덴티티를 강화할 수 있다.

    단점

    • 메뉴 항목이 많아질 경우 가독성이 떨어지고 디자인이 복잡해질 수 있음.
    • 작은 화면에서는 제한적인 공간 활용이 단점이 될 수 있다.

    사용 사례

    • 구글(Google): 간결한 로고와 최소한의 메뉴로 심플함을 극대화.
    • 애플(Apple): 주요 제품 카테고리를 상단에 배치해 사용자 중심의 탐색 제공.

    2. 사이드 내비게이션 바 (Side Navigation Bar)

    정의

    사이드 내비게이션 바는 화면의 좌측 또는 우측에 위치하며, 보통 수직으로 메뉴 항목을 배치한다. 대량의 메뉴 항목을 체계적으로 나열하기에 적합하다.

    특징

    • 공간 효율성이 높아 다양한 메뉴를 표시할 수 있다.
    • 사용자가 스크롤하면서도 메뉴를 계속 볼 수 있는 고정형으로 설계 가능.
    • 화면 크기에 따라 축소(햄버거 메뉴) 또는 확장될 수 있다.

    장점

    • 많은 메뉴를 깔끔하게 정리 가능.
    • 콘텐츠와의 분리가 명확해 사용자 혼란을 최소화.
    • 모바일과 데스크탑 모두에서 유용하게 활용 가능.

    단점

    • 화면 공간을 일부 차지해 콘텐츠 영역이 축소될 수 있음.
    • 처음 사용하는 사용자에게는 메뉴가 숨겨져 있을 경우 다소 혼란스러울 수 있다.

    사용 사례

    • 구글 드라이브(Google Drive): 파일 관리에 필요한 다양한 옵션을 사이드바에 배치.
    • 슬랙(Slack): 채널과 메시지 메뉴를 한곳에 정리하여 탐색 편의성을 제공.

    3. 바텀 내비게이션 바 (Bottom Navigation Bar)

    정의

    바텀 내비게이션 바는 화면 하단에 위치하며, 주로 모바일 애플리케이션에서 사용된다. 사용자의 손가락 접근성을 고려한 디자인으로, 편리한 탐색을 지원한다.

    특징

    • 손가락 터치에 최적화된 위치에 있어 접근성이 뛰어남.
    • 주요 메뉴를 간결하게 표시하며, 3~5개의 항목을 제공하는 것이 일반적.
    • 사용자가 콘텐츠를 탐색하면서도 내비게이션 바를 쉽게 사용할 수 있다.

    장점

    • 한 손으로 조작하기 편리하며 사용자 피로를 줄임.
    • 주요 기능에 빠르게 접근 가능.
    • 화면 전환을 최소화하여 사용자 여정을 매끄럽게 유지.

    단점

    • 메뉴 항목 수가 제한적이기 때문에 복잡한 정보 구조에는 적합하지 않음.
    • 화면 하단에 위치해 광고나 팝업과 겹칠 가능성.

    사용 사례

    • 인스타그램(Instagram): 사용자 탐색, 피드, 프로필 등 주요 기능 제공.
    • 유튜브(YouTube): 홈, 검색, 구독 등 자주 사용하는 메뉴를 간단히 배치.

    4. 메가 메뉴 (Mega Menu)

    정의

    메가 메뉴는 일반적으로 탑 내비게이션 바에서 확장되어 하위 메뉴를 포괄적으로 보여주는 방식이다. 많은 콘텐츠를 한 화면에서 제공할 수 있어 복잡한 정보 구조에 적합하다.

    특징

    • 여러 계층의 정보를 한눈에 제공.
    • 주로 이커머스 웹사이트나 정보 중심의 플랫폼에서 사용.
    • 사용자가 다양한 선택지를 쉽게 비교하고 탐색할 수 있음.

    장점

    • 복잡한 정보 구조를 명확하고 체계적으로 정리 가능.
    • 사용자가 원하는 정보를 빠르게 찾을 수 있음.
    • 시각적 요소와 결합해 흥미로운 사용자 경험 제공.

    단점

    • 과도한 정보 제공으로 인해 처음에는 압도감을 줄 수 있음.
    • 모바일 환경에서 적합하지 않을 수 있음.

    사용 사례

    • 아마존(Amazon): 카테고리별 제품 탐색을 위한 확장형 메뉴 제공.
    • 니먼 마커스(Neiman Marcus): 시각적 요소와 결합된 풍부한 탐색 경험.

    5. 풀스크린 내비게이션 바 (Full-Screen Navigation Bar)

    정의

    화면 전체를 내비게이션 메뉴로 사용하는 유형으로, 사용자가 메뉴 항목에만 집중할 수 있도록 설계된 형태다.

    특징

    • 주요 내비게이션 바가 활성화되면 화면 전체가 메뉴로 전환.
    • 콘텐츠와 완전히 분리된 구조로 명확한 탐색 경험 제공.

    장점

    • 사용자가 메뉴에만 집중할 수 있어 명확한 정보 제공.
    • 시각적 효과와 결합해 몰입감 높은 UI 제공.

    단점

    • 사용자가 메뉴를 닫지 않으면 콘텐츠 접근이 제한됨.
    • 단순한 정보 구조에만 적합할 수 있음.

    사용 사례

    • 구글 지도(Google Maps): 장소 탐색 시 검색 및 필터 메뉴를 풀스크린으로 제공.
    • 스트라이프(Stripe): 주요 메뉴를 풀스크린으로 제공해 명확한 탐색 유도.

    내비게이션 바 설계 시 유의점

    1. 사용자 중심의 정보 구조
      각 유형은 서비스 목적과 사용자 니즈에 따라 설계되어야 한다.
    2. 접근성과 가독성
      모든 사용자가 쉽게 탐색할 수 있도록 폰트 크기와 색상 대비를 고려해야 한다.
    3. 디바이스별 반응형 디자인
      모든 디바이스에서 일관된 탐색 경험을 제공해야 한다.

    결론

    내비게이션 바는 디지털 서비스의 성공 여부를 결정짓는 핵심 UI 요소다. 다양한 유형 중 적합한 방식을 선택하고, 사용자와 서비스의 목표에 맞게 설계한다면, 내비게이션 바는 단순한 메뉴를 넘어 사용자 경험을 향상시키는 중요한 도구가 될 것이다.


  • Navigation Bars – Pro

    Navigation Bars – Pro

    Understanding the Definition and Role of Navigation Bars in UX/UI

    Navigation bars are the fundamental building blocks of digital interfaces, guiding users through applications and websites. Despite their simplicity in appearance, their design and implementation carry a profound impact on usability, accessibility, and overall user experience. This article dives deep into the definition and role of navigation bars, offering insights into their significance in modern UI/UX design.

    What Is a Navigation Bar?

    A navigation bar, often abbreviated as a “nav bar,” is a UI component that organizes and presents the main options or destinations within a digital product. It serves as a roadmap, enabling users to traverse an application or website efficiently.

    From the simplest website with a few links to a complex enterprise system with multiple layers of content, the navigation bar is the interface’s backbone. Its structure directly affects how users interact with the platform and how intuitively they can accomplish their tasks.

    Characteristics of a Navigation Bar

    • Hierarchy Representation: Organizes content into logical categories.
    • Persistent Accessibility: Ensures users can always find their way back to key sections.
    • Visual Indicator: Communicates the current location within the system.
    • Consistency: Provides a unified experience across different pages or screens.

    The Role of Navigation Bars in Digital Design

    1. Structuring Content

    The primary role of a navigation bar is to structure content into a digestible and logical format. This structure enables users to find what they need without confusion, minimizing cognitive load. For instance, e-commerce websites use categories like “Home,” “Shop,” “Cart,” and “Profile” to segment user tasks effectively.

    2. Enhancing Usability

    Usability is a core tenet of UX design, and navigation bars play a pivotal role in achieving it. By following established conventions such as placing a top nav on desktop websites or a bottom nav on mobile apps, designers ensure a predictable and seamless user journey.

    3. Increasing Accessibility

    Navigation bars serve as an entry point for all users, including those with disabilities. Accessible nav bars, when designed correctly, enable everyone to interact with content. Screen readers, focusable elements, and keyboard navigation are essential considerations for achieving inclusivity.

    4. Encouraging User Engagement

    Navigation bars can guide users toward desired actions or content, influencing behavior. For example, a streaming platform’s nav bar may prioritize “Trending” or “Recommendations” to drive content discovery and engagement.

    5. Establishing Brand Identity

    The navigation bar is often the first touchpoint for users. Its design, typography, color scheme, and interaction style can communicate the brand’s identity. A sleek, minimalist nav bar aligns with a high-tech brand, while a playful, colorful one may suit a children’s product.

    Layers of Complexity in Navigation Bars

    While the concept of a navigation bar is simple, its implementation can be highly complex, especially in multi-layered systems like enterprise software or global e-commerce platforms.

    1. Single-Level Navigation

    Used for websites or apps with limited content, single-level navigation includes direct links to all primary sections.

    2. Multi-Level Navigation

    Larger platforms often require subcategories and nested menus. This complexity requires careful attention to hierarchy and discoverability. Dropdown menus, mega menus, and side panels are common solutions.

    3. Contextual Navigation

    Some applications use dynamic or contextual nav bars that adapt based on user actions. For instance, design software may display different options when editing text versus an image.

    4. Adaptive Navigation

    Adaptive nav bars respond to user behavior, such as frequently accessed sections or personalized recommendations. They leverage data and machine learning to create tailored experiences.

    Psychological and Cognitive Impact

    Navigation bars significantly affect how users perceive and interact with digital interfaces.

    1. Reducing Cognitive Load

    A well-structured nav bar reduces the mental effort required to locate information. By grouping related items and using clear labels, users can quickly understand the interface without unnecessary thought.

    2. Fostering Confidence

    Knowing that a navigation bar is consistently available reassures users. This sense of control is essential for user retention and satisfaction.

    3. Building Trust

    A clear and transparent navigation bar builds trust, as users feel the interface is reliable and easy to use. Misleading or poorly structured nav bars can frustrate users, leading to abandonment.

    4. Encouraging Exploration

    Nav bars designed with enticing visuals or intuitive flows encourage users to explore more sections of the app or website, increasing engagement and time spent on the platform.

    Practical Applications Across Platforms

    1. Mobile Navigation

    Mobile devices have limited screen space, so navigation bars need to prioritize essential functions. Common practices include bottom nav bars and hamburger menus for secondary options.

    2. Desktop Navigation

    With more screen real estate, desktop nav bars often feature horizontal layouts, dropdowns, and mega menus for greater content visibility.

    3. Wearables and IoT Devices

    On smaller screens, like smartwatches, navigation relies heavily on gestures or voice commands. The navigation bar is often minimal or context-specific.

    4. TV Interfaces

    For smart TVs, remote controls dictate navigation design. Horizontal scrolling or carousel-style navigation is common.

    Challenges in Navigation Design

    Designing an effective navigation bar requires addressing several challenges:

    • Overcrowding: Including too many options can overwhelm users.
    • Ambiguous Labels: Poorly chosen menu labels confuse users.
    • Inconsistency: Variations in navigation design across platforms create friction.
    • Accessibility: Ignoring accessibility features limits usability for diverse users.

    Future Trends in Navigation Bars

    1. Gesture-Based Navigation

    With the rise of touch interfaces, gestures are becoming a natural way to navigate.

    2. Voice Navigation

    As voice assistants grow in popularity, voice-based navigation will supplement traditional nav bars.

    3. AI-Driven Personalization

    Artificial intelligence can dynamically tailor nav bar options based on user behavior and preferences.

    4. Minimalist and Invisible Navigation

    Simplified designs that fade into the background, such as context-sensitive menus, are gaining traction.

    Conclusion

    Navigation bars are more than just functional elements—they are a cornerstone of user experience and brand interaction. By understanding their definition, role, and impact, designers can create intuitive, accessible, and engaging navigation systems that meet the needs of diverse users. As technology evolves, so will navigation design, making it an ever-exciting field for UX/UI professionals.


  • 내비게이션 바 – 심화

    내비게이션 바 – 심화

    내비게이션 바의 정의와 역할: 사용자 경험의 필수 UI 요소

    디지털 제품이 복잡하고 방대해질수록 사용자가 필요한 정보를 빠르게 찾을 수 있도록 안내하는 인터페이스가 중요해졌다. 그 중심에 있는 것이 바로 내비게이션 바(Navigation Bar)이다. 내비게이션 바는 사용자 경험(UX)을 구조화하고 사용자가 원하는 콘텐츠에 쉽게 접근할 수 있도록 돕는 중요한 UI 컴포넌트다. 이번 글에서는 내비게이션 바의 정의, 역할, 중요성, 설계 시 고려해야 할 요소들을 심층적으로 다룬다.


    내비게이션 바의 정의

    내비게이션 바는 웹사이트나 애플리케이션에서 사용자가 다양한 페이지나 섹션으로 이동할 수 있도록 제공되는 인터페이스다. 단순히 메뉴 항목을 나열하는 것이 아니라, 사용자가 현재 어디에 있는지, 어디로 갈 수 있는지를 명확히 보여주는 정보 구조의 핵심 역할을 한다.

    내비게이션 바의 기본 구성 요소

    1. 로고 또는 브랜드 요소: 홈으로 이동할 수 있는 브랜드 아이덴티티를 나타냄.
    2. 주요 메뉴 항목: 페이지 간 이동을 돕는 링크 모음.
    3. 검색 창: 사용자가 특정 정보를 빠르게 찾을 수 있도록 지원.
    4. 보조 메뉴: 로그인, 설정, 장바구니 등의 기능을 포함.
    5. 상태 표시: 현재 위치, 알림, 사용자 프로필 등.

    내비게이션 바의 역할

    1. 정보 탐색의 중심

    내비게이션 바는 사용자가 원하는 정보를 쉽고 빠르게 찾을 수 있도록 돕는다. 정보 구조를 체계적으로 정리하여 콘텐츠 접근성을 높인다.

    2. 사용자 위치 안내

    사용자는 현재 위치를 인지하지 못하면 혼란을 느낀다. 내비게이션 바는 사용자가 현재 어떤 페이지에 있는지 명확히 표시함으로써 위치 확인 기능을 제공한다.

    3. 서비스 가치 전달

    잘 설계된 내비게이션 바는 브랜드의 정체성과 서비스의 가치를 전달한다. 예를 들어, 애플의 내비게이션 바는 미니멀리즘을 통해 고급스러움을 전달한다.

    4. 사용자 행동 유도

    내비게이션 바는 특정 행동(예: 구매, 가입)을 유도하기 위한 핵심 경로를 제공한다. 이커머스 사이트에서는 ‘장바구니’나 ‘구매하기’ 버튼이 주요 위치에 배치된다.


    내비게이션 바의 중요성

    1. 사용자 경험의 핵심

    내비게이션 바는 UX의 전반적인 성공 여부를 결정짓는 요소다. 직관적이고 간결한 내비게이션 바는 사용자의 만족도를 높이고, 반대로 복잡하고 비효율적인 내비게이션 바는 이탈률을 증가시킨다.

    2. 정보 접근성과 유지성

    내비게이션 바는 **정보 접근성(Accessibility)**을 높이는 데 중요한 역할을 한다. 사용자는 빠르게 필요한 정보를 찾고, 서비스와의 유대감을 유지할 수 있다.

    3. 비즈니스 목표 달성

    내비게이션 바는 사용자와 비즈니스 간의 연결고리다. 사용자 여정을 매끄럽게 설계함으로써, 전환율과 매출 증가로 이어질 수 있다.


    내비게이션 바 설계 시 고려할 주요 요소

    1. 사용자 니즈 기반 설계

    사용자가 주로 탐색하려는 항목을 우선순위에 두고 메뉴를 구성해야 한다. 예를 들어, 뉴스 사이트는 최신 뉴스 카테고리를 가장 눈에 띄는 위치에 배치해야 한다.

    2. 직관성과 간결성

    메뉴 항목은 최소화하면서도 명확한 의미를 전달해야 한다. 너무 많은 항목은 사용자를 혼란스럽게 한다.

    3. 반응형 디자인

    모바일, 데스크탑, 태블릿 등 다양한 디바이스에서 원활히 작동하는 반응형 내비게이션 바는 필수다. 화면 크기에 따라 메뉴가 자동으로 적응되어야 한다.

    4. 시각적 계층 구조

    내비게이션 바는 시각적으로 명확한 계층 구조를 가져야 한다. 주요 메뉴와 보조 메뉴를 구분하고, 활성화된 메뉴는 강조 표시하여 사용자에게 현재 위치를 명확히 알려준다.


    내비게이션 바의 역할을 극대화하는 방법

    1. 가독성 높은 텍스트 사용

    내비게이션 바의 텍스트는 읽기 쉬운 폰트와 적절한 크기를 가져야 한다.

    2. 컬러 대비와 하이라이트

    활성화된 메뉴 항목은 다른 메뉴와 색상 대비를 두어 사용자가 현재 위치를 쉽게 파악할 수 있도록 한다.

    3. 애니메이션과 전환 효과

    메뉴가 확장되거나 축소될 때 자연스러운 애니메이션 효과를 추가하면 사용자 경험이 향상된다.

    4. 실시간 사용자 데이터 활용

    사용자의 탐색 기록이나 선호도를 기반으로 개인화된 메뉴를 제공하면 사용자 만족도가 크게 증가한다.


    내비게이션 바의 미래: 새로운 트렌드

    1. AI 기반 개인화 내비게이션

    사용자 행동 데이터를 분석하여 맞춤형 메뉴를 제공하는 AI 내비게이션 바가 주목받고 있다.

    2. 음성 인터페이스 통합

    음성 명령으로 탐색할 수 있는 내비게이션 바가 증가하고 있다. 예를 들어, 자동차 인터페이스에서 음성을 활용한 탐색이 활성화되고 있다.

    3. 제로 UI와 내비게이션

    화면을 최소화하거나 없애고 제스처, 음성, AR을 활용한 내비게이션 바가 미래의 흐름을 이끌고 있다.


    결론

    내비게이션 바는 단순한 메뉴 구성 요소를 넘어, 사용자 경험과 비즈니스 성공을 연결하는 핵심적인 UI 요소다. 효과적인 내비게이션 바는 사용자에게 직관적이고 만족스러운 탐색 경험을 제공하며, 비즈니스 목표를 달성하는 데 큰 기여를 한다. 끊임없이 진화하는 기술과 사용자 니즈에 발맞춰 내비게이션 바를 최적화한다면, 디지털 환경에서의 경쟁력을 확보할 수 있을 것이다.


  • Navigation Bars – Overview

    Navigation Bars – Overview

    Mastering Navigation Bars: A Comprehensive Guide for UX/UI Experts

    Navigation bars are the backbone of any digital interface. They act as a guide, helping users navigate through content seamlessly and achieve their goals efficiently. This article will explore the design principles, best practices, and use cases of navigation bars across platforms such as mobile, PC, and beyond, ensuring your designs meet Silicon Valley standards.

    Understanding Navigation Bars

    What Is a Navigation Bar?

    A navigation bar (nav bar) is a UI component that allows users to move between different sections of an application or website. It provides a structured layout for menu options, ensuring a logical flow and accessibility of content.

    Why Navigation Bars Are Crucial

    Navigation bars directly impact user experience, retention, and task completion rates. Poorly designed navigation can frustrate users, causing them to abandon the app or website. A well-optimized navigation bar ensures intuitive interaction and fosters user satisfaction.

    Key Design Principles

    1. Clarity and Simplicity

    • Use clear labels for menu items.
    • Avoid overcrowding; focus on primary options.
    • Ensure the design is intuitive and visually digestible.

    2. Consistency

    • Maintain uniform design patterns across the platform.
    • Keep navigation consistent between desktop, mobile, and other platforms.

    3. Accessibility

    • Ensure the nav bar is accessible via screen readers.
    • Use proper color contrast and focus states for interactive elements.

    4. Feedback and State Indicators

    • Highlight the current section (active state).
    • Use hover and click feedback to signal interactivity.

    Types of Navigation Bars

    1. Top Navigation

    • Commonly used in websites and desktop applications.
    • Best for horizontal screen layouts with ample space.

    2. Bottom Navigation

    • Popular for mobile apps due to easy thumb reach.
    • Use for up to 5 primary destinations.

    3. Side Navigation (Drawer)

    • Useful for complex systems with numerous menu items.
    • Often used for secondary or less-frequent actions.

    4. Tab Navigation

    • Great for categorizing content into multiple tabs.
    • Enhances discoverability and segmentation.

    5. Fixed vs. Dynamic Navigation

    • Fixed: Always visible on the screen (sticky navigation).
    • Dynamic: Hides during scrolling and reappears when needed.

    Platform-Specific Navigation Considerations

    1. Mobile Navigation

    • Design for touch: Ensure tap targets are large enough.
    • Prioritize key actions due to limited space.
    • Use icons with labels for clarity.

    2. Desktop Navigation

    • Utilize hover states for interaction cues.
    • Leverage dropdown menus for hierarchical structures.
    • Ensure responsiveness for varying screen sizes.

    3. Multi-Device Consistency

    • Align navigation experiences across mobile, tablet, desktop, and even wearables.
    • Keep transitions smooth between devices.

    Best Practices for Navigation Bars

    1. Prioritize Key Features

    • Focus on user priorities to determine menu structure.
    • Minimize cognitive load by showing only essential options.

    2. Test and Iterate

    • Conduct usability testing to identify pain points.
    • Use A/B testing to evaluate alternative designs.

    3. Incorporate Personalization

    • Offer adaptive navigation based on user behavior.
    • Leverage AI to highlight frequently used sections.

    4. Embrace Visual Hierarchy

    • Use font sizes, colors, and spacing to emphasize important elements.
    • Group related items for better organization.

    5. Optimize for Speed

    • Reduce latency in navigation interactions.
    • Use preloading techniques for faster content delivery.

    Case Studies and Examples

    1. Apple

    • Consistent navigation across devices: Top nav on desktop, bottom nav on iOS apps.
    • Clear icons and concise labels ensure usability.

    2. Google Material Design

    • Focus on simplicity and accessibility.
    • Dynamic navigation patterns adapt to various platforms.

    3. Pinterest Gestalt Principles

    • Emphasizes visual grouping for related actions.
    • Minimalist design aids in content discovery.

    Common Mistakes to Avoid

    1. Overloading the Navigation Bar

    Too many options can overwhelm users. Stick to core features.

    2. Ignoring Responsiveness

    Navigation must adapt seamlessly to different screen sizes.

    3. Lack of Feedback

    Interactive elements without hover or click feedback lead to confusion.

    4. Complex Terminology

    Use language that is straightforward and easy to understand.

    5. Overlooking Accessibility

    Failing to design for accessibility limits user inclusivity and engagement.

    Emerging Trends in Navigation Design

    1. Voice-Activated Navigation

    As voice assistants grow, navigation is shifting towards voice commands.

    2. Micro-Interactions

    Subtle animations provide cues and enhance the user experience.

    3. AI-Powered Navigation

    AI can predict user needs and adapt the navigation structure accordingly.

    Conclusion

    Designing navigation bars requires a balance of functionality, aesthetics, and user-centric thinking. By following these principles and best practices, you can create navigation systems that enhance usability, delight users, and drive engagement. Remember to continuously iterate and adapt based on user feedback and evolving technologies.


  • 내비게이션 바 – 개괄

    내비게이션 바 – 개괄

    내비게이션 바(Navigation Bar): UI 설계의 핵심 요소

    사용자 경험(UX)에서 내비게이션 바는 디지털 제품의 핵심이다. 웹사이트나 모바일 애플리케이션에서 사용자와의 상호작용을 연결하는 중요한 매개체로, 사용자가 원하는 정보를 쉽게 찾고 서비스의 가치를 극대화할 수 있도록 설계되어야 한다. 이번 글에서는 내비게이션 바의 정의, 유형, 설계 원칙, 각 매체에서의 차별점, 그리고 성공적인 내비게이션 바 구현 사례를 중심으로 살펴본다.


    내비게이션 바란 무엇인가?

    내비게이션 바는 사용자가 콘텐츠를 탐색할 수 있도록 안내하는 UI 컴포넌트다. 보통 화면 상단이나 측면에 위치하며, 주요 메뉴나 페이지로의 링크를 포함한다. 이를 통해 사용자는 서비스를 효율적으로 이용할 수 있고, 정보 구조가 잘 짜여 있다면 사용자의 피로도를 줄일 수 있다.


    내비게이션 바의 주요 유형

    1. 탑 내비게이션 바 (Top Navigation Bar)

    • 위치: 화면 상단에 위치
    • 특징: 간결하고 직관적이며 주로 데스크탑 환경에서 사용
    • 예시: 구글, 애플의 웹사이트

    2. 사이드 내비게이션 바 (Side Navigation Bar)

    • 위치: 화면 좌측 또는 우측에 위치
    • 특징: 대량의 메뉴를 포함할 때 적합
    • 예시: 슬랙, 구글 드라이브

    3. 바텀 내비게이션 바 (Bottom Navigation Bar)

    • 위치: 화면 하단에 위치
    • 특징: 모바일 환경에 최적화되어 있으며, 손쉬운 접근성 제공
    • 예시: 인스타그램, 유튜브

    4. 메가 메뉴 (Mega Menu)

    • 위치: 주로 상단 내비게이션 바에서 확장
    • 특징: 복잡한 정보 구조를 한눈에 제공
    • 예시: 이커머스 사이트(예: 아마존)

    내비게이션 바 설계 원칙

    1. 사용자 중심 디자인

    사용자의 행동 패턴을 분석하여 자주 사용하는 메뉴를 상위에 배치한다.

    2. 일관성 유지

    내비게이션 바는 모든 화면에서 동일하게 유지되어야 한다. 이는 사용자의 인지 부하를 줄이고, 서비스 이용의 편리성을 극대화한다.

    3. 정보 계층화

    중요한 정보는 상위 레벨에, 덜 중요한 정보는 하위 레벨에 배치해 정보 구조를 체계화한다.

    4. 반응형 디자인

    화면 크기에 따라 유동적으로 조정되는 반응형 내비게이션 바는 사용자 접근성을 향상시킨다.


    각 매체에서의 내비게이션 바 설계

    1. 모바일 환경

    • 특징: 화면 크기가 작아 공간 효율성이 중요하다.
    • 적용 방식: 바텀 내비게이션 바나 햄버거 메뉴 활용.

    2. 데스크탑 환경

    • 특징: 넓은 화면으로 콘텐츠를 한눈에 볼 수 있다.
    • 적용 방식: 탑 내비게이션 바 또는 메가 메뉴 활용.

    3. TV 환경

    • 특징: 리모컨 조작으로 인해 간결한 인터페이스 필요.
    • 적용 방식: 최소한의 메뉴와 직관적인 레이아웃.

    4. 자동차(IVI) 환경

    • 특징: 운전 중 사용해야 하므로 단순하고 직관적이어야 한다.
    • 적용 방식: 큰 아이콘과 음성 명령 기반 내비게이션.

    성공적인 내비게이션 바 구현 사례

    1. 애플(Apple)

    • 심플하고 직관적인 상단 내비게이션 바로 브랜드 아이덴티티를 강화.

    2. 넷플릭스(Netflix)

    • 콘텐츠 중심의 사이드 내비게이션 바와 개인화된 메뉴 설계.

    3. 우버(Uber)

    • 모바일 환경에 최적화된 바텀 내비게이션 바로 손쉬운 접근성 제공.

    내비게이션 바 설계 시 고려할 점

    1. 접근성(Accessibility)
      • 색상 대비, 텍스트 크기, 키보드 탐색 가능 여부 등을 확인.
    2. 애니메이션 사용
      • 자연스러운 전환 효과를 통해 사용자 경험을 강화.
    3. A/B 테스트
      • 다양한 디자인 시안을 테스트하여 최적의 내비게이션 바를 선택.

    결론

    내비게이션 바는 사용자 경험의 핵심 요소로, 정보 구조와 UI의 직관성을 좌우한다. 이를 설계할 때 사용자의 행동을 깊이 이해하고, 서비스와 일치하는 디자인을 적용하는 것이 중요하다. 플랫폼별 차이와 사례를 참고하여 최적화된 내비게이션 바를 설계한다면, 사용자 만족도를 높이고 서비스 성공에 크게 기여할 것이다.


  • Buttons – Final

    Buttons – Final

    The Complete Guide to Buttons in Digital Interfaces: Design, Development, and QA Insights

    Buttons are the cornerstone of user interaction in any digital interface. From guiding users through tasks to triggering crucial system functions, buttons play a pivotal role in the usability and success of a product. Designing, developing, and testing buttons may seem straightforward, but achieving excellence in their implementation requires attention to detail, collaboration across teams, and adherence to best practices.

    This article wraps up key insights about buttons, summarizing design considerations, development strategies, and QA best practices to ensure your buttons are intuitive, accessible, and high-performing.


    Why Buttons Matter in Digital Products

    Buttons are more than just clickable elements—they are the primary tools for driving user actions. Their importance lies in their ability to:

    • Guide users toward completing tasks (e.g., submitting forms, purchasing products).
    • Improve user workflows by providing clarity and visual cues.
    • Build trust and confidence through consistent design and behavior.

    The effectiveness of a button depends on its ability to meet user expectations, perform reliably, and align with the overall user experience.


    Designing Buttons: Key Takeaways

    The design phase of buttons lays the foundation for usability and aesthetics. Here are the critical aspects of button design:

    1. Clarity of Purpose

    Every button should have a clear and specific purpose, communicated effectively through its label and design. Action-oriented language, such as “Sign Up” or “Download Report,” guides users better than generic terms like “Submit.”

    Best Practices:

    • Use concise, actionable labels.
    • Maintain visual hierarchy by differentiating primary, secondary, and tertiary buttons.
    • Test labels with users to ensure clarity.

    2. Consistency in Style

    Buttons should adhere to a unified design language to create familiarity and reduce cognitive load. Consistent use of color, size, and typography helps users predict button behavior.

    Best Practices:

    • Establish a design system with predefined button styles.
    • Use distinct visual cues (e.g., hover effects) for interactive elements.
    • Ensure uniformity across all screens and devices.

    3. Accessibility

    Inclusive design is critical for buttons. Accessible buttons ensure that all users, including those with disabilities, can interact with your product.

    Best Practices:

    • Provide clear focus states for keyboard users.
    • Ensure contrast ratios meet WCAG standards.
    • Add ARIA labels for screen readers to describe button functionality.

    4. Feedback and States

    Buttons must communicate their state (default, hover, active, disabled) to help users understand their functionality and system responses.

    Best Practices:

    • Use visual feedback, such as color changes or animations, to indicate button states.
    • Include loading indicators for actions that take time to process.
    • Test buttons under different scenarios to ensure state transitions are smooth.

    5. Placement and Layout

    Strategic button placement enhances usability and helps users complete tasks efficiently. Buttons should align with user expectations and be positioned intuitively within the interface.

    Best Practices:

    • Place primary buttons in prominent locations (e.g., bottom-right of forms).
    • Maintain adequate spacing between buttons to prevent accidental clicks.
    • Follow platform-specific guidelines for button placement on mobile and desktop.

    Developing Buttons: Key Takeaways

    Once the design is finalized, development ensures that buttons are functional, responsive, and scalable across different platforms.

    1. Responsive and Touch-Friendly Design

    Buttons must adapt seamlessly to various screen sizes and input methods. Mobile users, in particular, need buttons that are large enough to tap and positioned within easy reach.

    Best Practices:

    • Use a minimum touch target size of 48x48dp.
    • Optimize button layouts for different screen resolutions using CSS media queries.
    • Provide touch feedback (e.g., haptic vibrations) for mobile interactions.

    2. State Management

    Managing button states programmatically is essential to prevent errors and ensure smooth interactions.

    Best Practices:

    • Disable buttons when actions are unavailable or in progress.
    • Display loading states for actions requiring backend responses.
    • Test transitions between states to avoid unexpected behavior.

    3. Performance Optimization

    Efficiently developed buttons contribute to the overall performance of the product. Poorly optimized buttons can slow down interactions and frustrate users.

    Best Practices:

    • Minimize dependencies and avoid inline styles.
    • Use lightweight SVG icons instead of raster images.
    • Test button performance under various network conditions and device types.

    4. Scalability with Design Systems

    Using design systems allows teams to create reusable button components, ensuring consistency and scalability across products.

    Best Practices:

    • Develop modular button components with customizable properties.
    • Use frameworks like React or Vue for dynamic button behavior.
    • Collaborate with designers to ensure the design system aligns with the product vision.

    QA Testing Buttons: Key Takeaways

    The final step in creating effective buttons is thorough QA testing. Testing ensures buttons function as expected, provide a seamless user experience, and handle edge cases gracefully.

    1. Functional Testing

    Verify that all buttons perform their intended actions and handle both valid and invalid inputs correctly.

    Best Practices:

    • Test buttons across different scenarios, including clicks, taps, and hover interactions.
    • Validate dynamic behavior, such as enabling/disabling based on input conditions.
    • Simulate backend responses to ensure buttons handle errors effectively.

    2. Accessibility Testing

    Ensure buttons are usable by all users, including those relying on assistive technologies.

    Best Practices:

    • Test buttons with screen readers to verify clear labels and roles.
    • Check focus states during keyboard navigation.
    • Use tools like axe or Lighthouse to audit accessibility compliance.

    3. Cross-Browser and Cross-Device Testing

    Buttons must work consistently across various browsers, operating systems, and devices.

    Best Practices:

    • Test buttons on popular browsers like Chrome, Safari, Firefox, and Edge.
    • Verify button layout and responsiveness on mobile, tablet, and desktop devices.
    • Check hover effects and touch interactions to ensure compatibility.

    4. Performance and Load Testing

    Assess how buttons behave under different performance conditions, such as slow network speeds or heavy user loads.

    Best Practices:

    • Measure response times for button interactions.
    • Simulate rapid clicks to prevent duplicate submissions.
    • Test under varying network conditions to validate loading states.

    5. Error Handling

    Test how buttons respond to edge cases, such as invalid inputs, API failures, or timeouts.

    Best Practices:

    • Simulate server errors to ensure appropriate error messages are displayed.
    • Validate disabled states for buttons relying on incomplete user inputs.
    • Test retry mechanisms for buttons triggering transient errors.

    Wrap-Up: The Button Lifecycle

    Creating effective buttons requires a collaborative effort across design, development, and QA teams. Each phase contributes to a seamless user experience, from crafting intuitive designs to ensuring robust functionality and performance.

    Summary of Key Steps:

    1. Design: Focus on clarity, consistency, accessibility, and strategic placement.
    2. Development: Prioritize responsiveness, scalability, and performance.
    3. QA Testing: Verify functionality, accessibility, cross-environment compatibility, and error handling.

    By following these guidelines, you can deliver buttons that not only look great but also perform reliably across all user interactions.


  • 버튼 – 종합

    버튼 – 종합

    버튼의 모든 것: 설계, 개발, QA까지 성공적인 구현을 위한 완벽 가이드


    개요

    버튼은 디지털 인터페이스의 가장 기본적인 컴포넌트이자 사용자 경험(UX)을 결정짓는 중요한 요소입니다. 버튼의 설계, 퍼블리싱, 개발, QA는 단순한 클릭 가능한 영역을 넘어, 사용자와 시스템 간의 원활한 상호작용을 지원하기 위한 다양한 요소를 포함합니다. 이번 글에서는 앞서 다룬 내용을 기반으로, 버튼과 관련된 모든 핵심 포인트를 종합적으로 정리하며, 설계부터 QA까지 성공적인 버튼 구현을 위한 가이드를 제공합니다.


    버튼 설계의 핵심 요소

    버튼 설계는 사용자 경험을 최우선으로 고려해야 하며, 직관적이고 명확하게 사용자의 기대에 부응하는 디자인이어야 합니다. 다음은 버튼 설계에서 주목해야 할 주요 요소들입니다.

    1. 명확하고 직관적인 텍스트

    • 버튼에 표시되는 텍스트는 사용자가 버튼의 기능을 한눈에 이해할 수 있도록 간결하고 직관적이어야 합니다.
    • 예: “확인”보다는 “저장 완료하기”처럼 구체적인 동사를 활용.

    2. 시각적 우선순위

    • 주요 작업 버튼(Primary Button)은 강렬한 색상과 큰 크기로, 보조 버튼(Secondary Button)은 중립적인 색상으로 차별화.
    • 버튼 간 간격과 위치를 조정해 사용자가 중요한 작업을 놓치지 않도록 설계.

    3. 피드백 제공

    • 버튼 클릭 시 시각적/애니메이션 피드백(색상 변화, 음영 추가 등)을 제공하여 사용자에게 명확한 반응을 전달.

    4. 반응형 디자인

    • 데스크톱, 태블릿, 모바일 등 모든 디바이스에서 버튼이 적절히 렌더링되도록 설계.
    • 모바일 환경에서는 충분한 터치 영역(48x48px 이상)을 제공.

    버튼 퍼블리싱과 개발: 안정성과 일관성을 위한 전략

    버튼 퍼블리싱과 개발은 설계된 버튼이 실제로 화면에 구현되고, 안정적이고 일관되게 동작하도록 만드는 과정입니다. 이 단계에서는 코드 최적화와 사용자 접근성을 고려해야 합니다.

    1. 버튼 상태 정의

    • 기본 상태(Default), 호버(Hover), 클릭(Active), 비활성화(Disabled), 로딩(Loading) 등 버튼의 다양한 상태를 명확히 정의.
    • CSS로 상태를 관리하며, 필요시 JavaScript를 활용해 동적 상태 전환 구현.

    2. 접근성 준수

    • aria-label 속성을 활용해 버튼의 목적을 스크린 리더가 명확히 인식할 수 있도록 설정.
    • 색상 대비는 WCAG 기준(4.5:1)을 충족해야 하며, 키보드 네비게이션(탭, 스페이스/엔터키)을 지원.

    3. 성능 최적화

    • 버튼에 사용되는 애니메이션은 CSS로 처리해 성능을 최적화하고, 불필요한 JavaScript 사용은 지양.
    • 로딩 상태는 작업 중임을 사용자에게 명확히 알리고, 서버와의 중복 요청을 방지.

    버튼 QA: 완벽한 동작과 사용자 경험을 위한 검증

    QA는 버튼이 정의된 동작을 정확히 수행하며, 모든 환경에서 일관된 사용성을 제공하는지 확인하는 필수 과정입니다.

    1. 기능 테스트

    • 버튼 클릭 시 지정된 동작(폼 제출, 페이지 이동, 데이터 삭제 등)이 정상적으로 실행되는지 확인.
    • 중복 클릭 방지를 테스트하여 사용자 오류를 예방.

    2. 시각적 테스트

    • 버튼의 디자인이 설계된 대로 렌더링되는지 확인하며, 다양한 디바이스와 브라우저에서 스타일이 일관되게 유지되는지 검증.

    3. 접근성 테스트

    • 스크린 리더 사용 시 버튼의 목적이 명확히 전달되는지 확인.
    • 색상 대비, 키보드 네비게이션, 터치 영역 등 사용 편의성을 테스트.

    4. 성능 테스트

    • 버튼 클릭 후 반응 속도를 측정하고, 2초 이내에 작업이 완료되도록 설정.
    • 서버와의 요청 횟수를 최소화하고, 로딩 상태를 명확히 표시.

    버튼 설계, 개발, QA의 상호 연결성

    버튼의 성공적인 구현은 설계, 퍼블리싱/개발, QA 과정이 유기적으로 연결될 때 가능합니다. 각 단계에서의 핵심 포인트를 종합하여 다음과 같이 정리할 수 있습니다.

    설계 단계

    • 목적 정의: 버튼의 역할과 위치를 명확히 설정.
    • 시각적 계층: 주요 버튼과 보조 버튼의 우선순위를 구분.
    • 피드백 요소: 사용자 반응을 시각적으로 전달할 설계 포함.

    퍼블리싱/개발 단계

    • 일관성 유지: 디자인 시스템에 따라 스타일과 동작을 코딩.
    • 접근성 보장: 다양한 사용자 환경에서 문제없이 작동하도록 구현.
    • 반응형 대응: 모든 디바이스와 해상도에서 버튼의 크기와 위치를 최적화.

    QA 단계

    • 기능 검증: 버튼이 설계된 대로 동작하는지 테스트.
    • 시각적 확인: 브라우저와 디바이스 간 디자인 차이를 점검.
    • 성능 테스트: 클릭 반응 시간과 로딩 상태를 최적화.

    실무 적용을 위한 체크리스트

    마지막으로, 실무에서 버튼 설계와 구현의 모든 단계를 아우르는 체크리스트를 제시합니다.

    설계 체크리스트

    • 버튼 텍스트가 명확하고 행동 중심적으로 작성되었는가?
    • 주요 버튼과 보조 버튼의 우선순위가 시각적으로 구분되는가?
    • 모든 상태(기본, 호버, 클릭, 비활성화, 로딩)가 정의되었는가?

    퍼블리싱/개발 체크리스트

    • CSS와 JavaScript로 버튼 상태를 정확히 구현하였는가?
    • 접근성을 준수하며, aria-label과 키보드 네비게이션이 지원되는가?
    • 반응형 디자인이 적용되었는가?

    QA 체크리스트

    • 버튼 클릭 시 정의된 동작이 정상적으로 실행되는가?
    • 모든 브라우저와 디바이스에서 디자인과 기능이 일관되는가?
    • 서버와의 요청이 중복되지 않으며, 로딩 상태가 명확히 표시되는가?

    결론

    버튼은 단순한 클릭 요소 이상으로, 사용자 경험과 인터페이스의 신뢰성을 결정짓는 핵심 컴포넌트입니다. 설계, 퍼블리싱/개발, QA의 각 단계에서 주의 깊게 다뤄야 할 요소들을 체계적으로 점검하면, 버튼이 다양한 사용자 환경에서 안정적이고 일관되게 동작하도록 보장할 수 있습니다. 이 글을 통해 버튼 구현의 모든 단계를 종합적으로 이해하고, 실무에 적용할 수 있는 전략을 마련하시기 바랍니다.


  • Buttons – QA

    Buttons – QA

    5 Key Considerations for QA Testing Buttons in Digital Interfaces

    Buttons are central to user interaction in any digital product, and their functionality must be thoroughly tested to ensure a seamless user experience. Quality Assurance (QA) for buttons is not just about verifying clicks—it involves assessing usability, accessibility, responsiveness, and overall performance across different environments. A failure in button functionality can lead to frustrated users, incomplete tasks, and a loss of trust in your product.

    In this article, we’ll outline the five most critical areas to focus on when conducting QA testing for buttons and provide actionable strategies to ensure their robustness and reliability.


    1. Functional Testing: Verifying Core Button Actions

    Why It Matters:

    Buttons must perform their intended actions consistently and accurately. Any failure in functionality can render parts of the interface unusable, directly impacting user experience and business goals.

    Key Testing Areas:

    • Click/Tap Actions: Verify that clicking or tapping the button triggers the expected action, such as form submission, navigation, or a modal popup.
    • State Transitions: Test all button states—default, hover, active, disabled, and loading.
    • Dynamic Behavior: Validate buttons that rely on dynamic conditions, such as enabling/disabling based on user input or API responses.

    Example Tests:

    • Clicking the “Submit” button should send the form data to the server.
    • A disabled button should not perform any action when clicked.
    • A “Loading” button state should appear until the backend response is received.

    Checklist for Functional Testing:

    1. Simulate user interactions (clicks, taps) on all buttons across the interface.
    2. Test buttons with both valid and invalid inputs to ensure error handling.
    3. Verify that conditional buttons (e.g., “Next”) enable/disable as expected.

    2. Accessibility Testing: Ensuring Inclusivity

    Why It Matters:

    Accessibility ensures that all users, including those with disabilities, can interact with buttons effectively. Buttons that fail accessibility checks can exclude users and expose the product to legal risks under standards like WCAG.

    Key Testing Areas:

    • Keyboard Navigation: Buttons must be focusable and operable using only the keyboard.
    • Focus Indicators: Ensure buttons have visible focus styles to guide keyboard and assistive technology users.
    • Screen Reader Support: Buttons should have descriptive labels for screen readers using ARIA attributes or accessible text.
    • Contrast Ratios: Text and background colors must meet WCAG contrast guidelines for readability.

    Example Tests:

    • Tab through the interface to ensure buttons receive focus in the correct order.
    • Use screen readers like NVDA or VoiceOver to test how button labels and roles are announced.
    • Validate color contrast using tools like Contrast Checker.

    Checklist for Accessibility Testing:

    1. Test buttons with screen readers for clear labeling and contextual descriptions.
    2. Verify focus indicators are visible on all buttons during keyboard navigation.
    3. Ensure icon-only buttons include ARIA labels for context.

    3. Cross-Browser and Cross-Device Testing

    Why It Matters:

    Users access interfaces on a variety of devices and browsers, each with unique rendering behaviors. Buttons must function consistently across all environments to avoid alienating segments of your audience.

    Key Testing Areas:

    • Browser Compatibility: Test buttons on major browsers, including Chrome, Firefox, Safari, Edge, and mobile browsers.
    • Device Responsiveness: Ensure buttons adapt to different screen sizes and resolutions.
    • Touchscreen Usability: Verify button functionality on touchscreen devices like smartphones and tablets.

    Example Tests:

    • A “Sign Up” button should render and function the same way in both Chrome and Safari.
    • On mobile, the button should have a sufficient touch target size (48x48dp) for easy tapping.
    • Test hover effects on desktop and ensure they don’t cause usability issues on mobile.

    Checklist for Cross-Browser and Cross-Device Testing:

    1. Test buttons on popular browsers and their older versions.
    2. Verify button layout, spacing, and functionality on various devices, including mobile, tablet, and desktop.
    3. Ensure hover effects gracefully degrade for touch devices.

    4. Performance Testing: Optimizing Speed and Feedback

    Why It Matters:

    Users expect immediate feedback when interacting with buttons. Delayed responses or unresponsive buttons can frustrate users and lead to task abandonment. Performance testing ensures buttons provide instant feedback and maintain smooth functionality.

    Key Testing Areas:

    • Response Times: Verify that button interactions trigger actions without noticeable delays.
    • Loading Indicators: Ensure buttons display appropriate feedback (e.g., spinners) during background processes.
    • Concurrency Handling: Test how buttons behave under heavy user loads or multiple simultaneous clicks.

    Example Tests:

    • Clicking the “Download” button should trigger a file download without delays.
    • A “Submit” button should disable after being clicked to prevent duplicate submissions.
    • Test scenarios where multiple users interact with the same button simultaneously (e.g., voting buttons).

    Checklist for Performance Testing:

    1. Measure the response time for button interactions using performance monitoring tools.
    2. Test buttons with different network conditions (e.g., slow, fast, offline).
    3. Simulate rapid or multiple clicks to ensure proper concurrency handling.

    5. Error Handling and Edge Case Testing

    Why It Matters:

    Buttons often rely on complex interactions with backend systems, APIs, or dynamic conditions. Testing for edge cases and errors ensures buttons handle unexpected scenarios gracefully without breaking the user experience.

    Key Testing Areas:

    • API Failures: Test how buttons behave when the backend system is unavailable or returns an error.
    • Invalid Inputs: Validate buttons with incomplete or incorrect user inputs.
    • Timeouts: Ensure buttons provide feedback for long-running actions or system timeouts.

    Example Tests:

    • Clicking “Save” when the server is down should display an error message like “Unable to save. Please try again later.”
    • A “Next” button should remain disabled until all required fields are filled.
    • Test buttons under various API response times to verify appropriate loading states.

    Checklist for Error Handling:

    1. Simulate backend failures to ensure error messages are displayed appropriately.
    2. Validate disabled states for buttons that rely on user inputs.
    3. Test retry mechanisms for buttons with transient errors.

    Best Practices for Button QA Testing

    1. Automate Repetitive Tests

    Automate functional and regression tests for buttons to save time and ensure consistent results. Tools like Selenium or Cypress can be used to script interactions and validate button behaviors.

    2. Involve Real Users

    Conduct usability testing with real users to identify issues that automated testing might miss. Focus on how users interact with buttons in real-world scenarios.

    3. Document Test Cases

    Maintain detailed documentation of button test cases, including expected outcomes and edge cases. This ensures thorough coverage and simplifies collaboration across teams.

    4. Collaborate with Designers and Developers

    Work closely with designers and developers to understand button specifications, including styles, states, and dynamic conditions.

    5. Use Analytics for Post-Launch Monitoring

    Monitor button interactions using analytics tools to identify drop-offs, misclicks, or low engagement areas. Use this data to iterate and improve button performance.


    Conclusion

    QA testing for buttons is about more than verifying clicks—it involves ensuring functionality, accessibility, responsiveness, performance, and error handling. By focusing on these five critical areas, you can create buttons that are reliable, user-friendly, and resilient under various conditions. Thoughtful testing not only enhances the user experience but also strengthens the overall quality and trustworthiness of your product.


  • 버튼 – QA

    버튼 – QA

    버튼 QA 진행 시 가장 유의해야 할 5가지: 완벽한 기능성을 위한 체크리스트


    개요

    버튼은 사용자 인터페이스에서 가장 기본적이면서도 중요한 요소입니다. 버튼이 제대로 작동하지 않거나 예상대로 반응하지 않는다면, 이는 사용자의 경험을 크게 저하시킬 수 있습니다. 따라서 버튼 QA(Quality Assurance) 과정은 버튼의 기능성, 안정성, 접근성, 디자인 일관성을 점검하는 중요한 단계입니다. 이번 글에서는 버튼 QA를 진행할 때 반드시 확인해야 할 5가지 핵심 사항을 상세히 다룹니다.


    1. 기능 테스트: 버튼의 동작 확인

    버튼의 가장 중요한 역할은 사용자가 클릭했을 때 올바른 작업이 실행되는 것입니다. 기능 테스트는 버튼이 정의된 목적대로 동작하는지 확인하는 첫 번째 단계입니다.

    검토 항목

    1. 정의된 동작 확인
      • 버튼을 클릭했을 때 예상된 동작(페이지 이동, 폼 제출, 데이터 삭제 등)이 실행되는지 확인.
      • 예: “제출” 버튼이 클릭되었을 때 폼 데이터가 서버에 정상적으로 전송되는지 확인.
    2. 예외 처리 확인
      • 버튼 클릭 시 오류 메시지나 로딩 실패 상황이 적절히 처리되는지 테스트.
      • 예: 네트워크 장애 발생 시 “인터넷 연결을 확인하세요”와 같은 메시지가 표시되는지 확인.
    3. 중복 클릭 방지
      • 버튼 클릭 시 중복 동작이 발생하지 않도록 설정되어 있는지 확인.
      • 예: “결제” 버튼 클릭 후 동일 작업이 여러 번 실행되지 않도록 비활성화 상태로 전환.

    QA 팁

    • 자동화 테스트 도구 활용:
      • Selenium 또는 Cypress를 활용하여 버튼의 동작을 반복적으로 테스트.
    • 클릭 이벤트 테스트 코드 예시: test('버튼 클릭 테스트', () => { const button = document.querySelector('.submit-button'); button.click(); expect(serverResponse).toBe('폼 제출 성공'); });

    2. 시각적 테스트: 버튼 디자인과 스타일 확인

    버튼의 시각적 일관성은 사용자 경험을 유지하는 데 필수적입니다. QA 과정에서는 버튼의 디자인이 디자인 가이드라인을 준수하는지, UI 요소 간 일관성이 유지되는지를 확인해야 합니다.

    검토 항목

    1. 버튼 스타일 확인
      • 색상, 크기, 여백, 폰트 등이 디자인 시스템과 일치하는지 확인.
      • 예: 기본 버튼은 파란색(#007BFF), 비활성화 상태는 회색(#CCCCCC)으로 설정.
    2. 반응형 디자인 확인
      • 데스크톱, 태블릿, 모바일에서 버튼의 크기와 위치가 정상적으로 렌더링되는지 테스트.
      • 예: 모바일 화면에서 버튼이 화면 너비에 맞게 확장되는지 확인.
    3. 호버 및 클릭 상태 확인
      • 버튼의 호버, 클릭, 비활성화 상태가 올바르게 표시되는지 확인.
      • 예: 호버 시 배경색이 밝아지고, 클릭 시 버튼이 눌린 것처럼 보이는지 확인.

    QA 팁

    • 시각적 회귀 테스트 도구 활용:
      • Percy 또는 Applitools와 같은 도구를 사용해 버튼 스타일 변경 여부를 자동으로 감지.
    • CSS 상태 점검 코드 예시: .button:hover { background-color: #0056b3; }

    3. 접근성 테스트: 다양한 사용자 환경에서의 사용 가능성 확인

    버튼은 다양한 사용자 환경에서도 동일한 접근성을 제공해야 합니다. 특히 장애를 가진 사용자가 문제없이 버튼을 사용할 수 있는지가 중요한 검토 항목입니다.

    검토 항목

    1. 키보드 네비게이션 테스트
      • Tab 키로 버튼에 포커스할 수 있고, Enter 또는 Space 키로 클릭 동작이 실행되는지 확인.
    2. 스크린 리더 지원 확인
      • 버튼 텍스트가 스크린 리더를 통해 정확히 전달되는지 확인.
      • 예: aria-label 속성을 사용하여 버튼의 목적을 명확히 전달.
    3. 색상 대비 테스트
      • 버튼 텍스트와 배경색의 대비가 WCAG(Web Content Accessibility Guidelines) 기준(4.5:1 이상)을 충족하는지 확인.
      • 예: 어두운 배경색(#003366)과 밝은 텍스트(#FFFFFF)는 적절한 대비를 가짐.

    QA 팁

    • 접근성 테스트 도구 활용:
      • Lighthouse 또는 Axe DevTools를 사용해 버튼의 접근성을 자동으로 테스트.
    • 스크린 리더 점검 코드 예시: <button aria-label="상품 삭제">삭제</button>

    4. 퍼포먼스 테스트: 버튼의 반응 속도 확인

    버튼 클릭 시 시스템의 반응 속도는 사용자 경험에 큰 영향을 미칩니다. 느린 반응은 사용자 불만족을 초래할 수 있으므로, 성능 최적화는 필수입니다.

    검토 항목

    1. 반응 시간 측정
      • 버튼 클릭 후 작업이 완료될 때까지의 시간을 측정.
      • 예: “로그인” 버튼 클릭 후 대기 시간이 2초를 넘지 않도록 설정.
    2. 로딩 상태 구현 확인
      • 서버 응답 시간이 길어질 경우, 로딩 애니메이션이나 메시지가 적절히 표시되는지 확인.
      • 예: “결제 처리 중…” 스피너가 표시되는지 확인.
    3. 서버와의 요청 횟수 최소화
      • 중복 클릭 방지와 함께, 불필요한 서버 요청이 발생하지 않도록 설정.

    QA 팁

    • 퍼포먼스 테스트 도구 활용:
      • Google Lighthouse 또는 WebPageTest를 사용해 버튼 클릭 후 성능을 분석.
    • JS 비동기 처리 코드 예시: async function submitForm() { const button = document.querySelector('.submit-button'); button.disabled = true; button.innerHTML = '<span class="spinner"></span> 처리 중...'; const response = await fetch('/submit-form'); button.disabled = false; button.innerHTML = '제출하기'; }

    5. 브라우저 및 디바이스 호환성 테스트

    버튼은 다양한 브라우저와 디바이스 환경에서 일관되게 동작해야 합니다. QA 과정에서는 브라우저 간 호환성과 디바이스별 렌더링 차이를 꼼꼼히 점검해야 합니다.

    검토 항목

    1. 크로스 브라우저 테스트
      • Chrome, Safari, Firefox, Edge 등 주요 브라우저에서 버튼이 동일하게 동작하는지 확인.
      • 예: border-radius 스타일이 모든 브라우저에서 동일하게 렌더링되는지 확인.
    2. 디바이스별 테스트
      • 데스크톱, 태블릿, 모바일에서 버튼의 크기, 위치, 클릭 가능한 영역을 점검.
      • 예: 모바일 환경에서 터치 영역이 충분히 넓은지 확인.
    3. 구형 브라우저 호환성 확인
      • 프로젝트 요구 사항에 따라 Internet Explorer 11과 같은 구형 브라우저에서도 기본 동작이 유지되는지 확인.

    QA 팁

    • 테스트 도구 활용:
      • BrowserStack 또는 CrossBrowserTesting을 사용해 다양한 브라우저와 디바이스에서 테스트.
    • CSS 대체 속성 활용: .button { border-radius: 8px; -webkit-border-radius: 8px; /* 구형 브라우저 지원 */ }

    결론

    버튼 QA는 단순히 클릭 테스트를 넘어, 사용자 경험의 모든 측면을 철저히 점검하는 과정입니다. 기능 테스트, 시각적 일관성, 접근성, 성능 최적화, 브라우저 호환성 등 다섯 가지 핵심 요소를 꼼꼼히 점검하면 버튼이 모든 환경에서 안정적이고 일관되게 동작할 수 있습니다. 철저한 QA는 사용자 만족도와 서비스 품질을 높이는 핵심 단계입니다.